Add additional checks to ensure only valid PPM pulse trains are accepted. Add auto-idle feature to ensure vehicle stops if PPM signal is lost. Co-authored-by: Tobias Mädel <t.maedel@alfeld.de> |
||
|---|---|---|
| build | ||
| Drivers | ||
| Inc | ||
| Src | ||
| .gitignore | ||
| Makefile | ||
| pinout.png | ||
| README.md | ||
| startup_stm32f103xe.s | ||
| STM32F103RCTx_FLASH.ld | ||
This firmware is much better than the old one. tested up to 40A / 60V, no dead board so far :)
hoverboard-firmware-hack
This repo contains open source firmware for generic Hoverboard Mainboards. The firmware you can find here allows you to use your Hoverboard Hardware (like the Mainboard, Motors and Battery) for cool projects like driving armchairs, person-tracking transportation robots and every other application you can imagine that requires controlling the Motors.
If you want an overview of what you can do with this firmware, here is a ~40min video of a talk about this project: https://media.ccc.de/v/gpn18-95-howto-moving-objects
Hardware
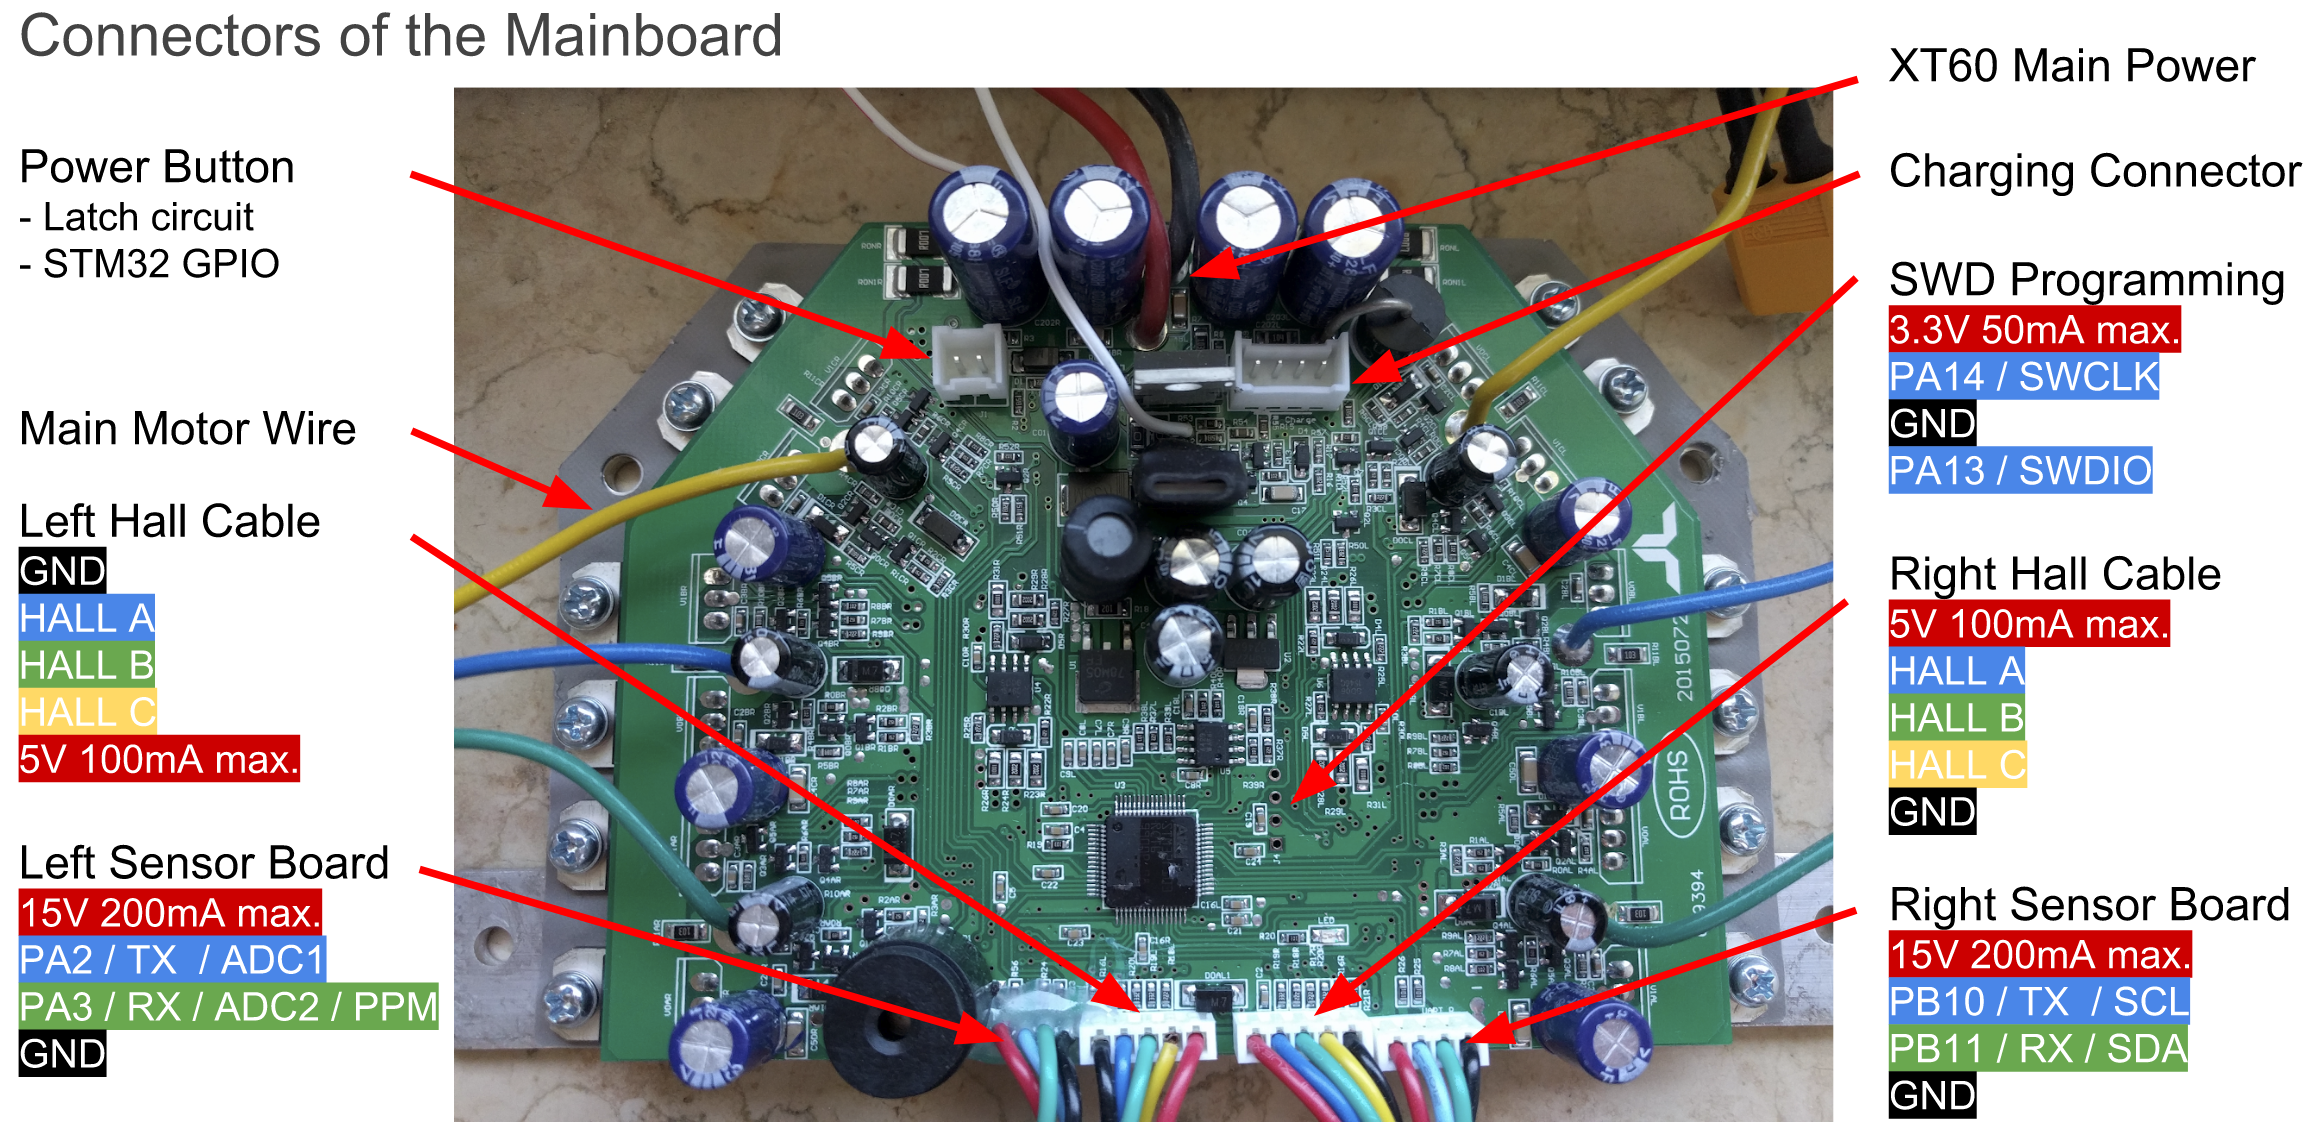
The original Hardware supports two 4-pin cables that originally were connected to the two sensor boards. They break out GND, 12/15V and USART2&3 of the Hoverboard mainboard. Both USART2 & 3 can be used for UART and I2C, PA2&3 can be used as 12bit ADCs.
The reverse-engineered schematics of the mainboard can be found here: http://vocke.tv/lib/exe/fetch.php?media=20150722_hoverboard_sch.pdf
Flashing
To build the firmware, just type "make". Make sure you have specified your gcc-arm-none-eabi binary location in the Makefile. Right to the STM32, there is a debugging header with GND, 3V3, SWDIO and SWCLK. Connect these to your SWD programmer, like the ST-Link found on many STM devboards.
Make sure you hold the powerbutton or connect a jumper to the power button pins while flashing the firmware, as the STM might release the power latch and switches itself off during flashing.
To flash the STM32, use the ST-Flash utility (https://github.com/texane/stlink).
If you never flashed your mainboard before, the STM is probably locked. To unlock the flash, use the following OpenOCD command:
openocd -f interface/stlink-v2.cfg -f target/stm32f1x.cfg -c init -c "reset halt" -c "stm32f1x unlock 0"
Then you can simply flash the firmware:
st-flash --reset write build/hover.bin 0x8000000
Troubleshooting
First, check that power is connected and voltage is > 36V. If the board draws more than 100mA in idle, it's probably broken.
If the motors do something, but don't rotate smooth and quietly, try to use an alternative phase mapping. Usually, color-correct mapping (blue to blue, green to green, yellow to yellow) works fine. However, some hoverboards have a different layout then others, and this might be the reason your motor isn't spinning.
Examples
Have a look at the config.h in the Inc directory. That's where you configure to firmware to match your project. Currently supported: Wii Nunchuck, analog potentiometer and PPM signal from a RC remote. If you need additional features like a boost button, have a look at the while(1) loop in the main.c